

How To Draw A Turtle Swimming
How to draw a turtle: two different ways
Learn how to draw a turtle. Start with a simple top view turtle and learn how to draw the turtle shell pattern. Next draw a nice sea turtle from an angle.

Our first turtle is very simple, using just a few shapes and a top view. The secret to why this turtle looks so good despite being so simple is all in the hexagon-pattern shell!
Our second turtle is a bit harder, using more shapes and a different angle, but the resulting turtle will make you look like a turtle-drawing master!
pencil
,
eraser
,
colour pencils
drawing paper
or
sketch book
Love drawing? Never miss a tutorial!
How to draw a turtle and the shell pattern in a simple top view

Our first turtle is great for beginners, since it uses just a few simple shapes – ovals, circles, triangles, and hexagons – to make the body of the turtle. The top view that we use in this drawing is also great for practising the hexagon pattern of the shell. We will start with the central ridge and build or shell pattern in quite a simple way, despite how complex the result might look.
Drawing turtle in the simple top view
Step 1 : Draw the base shapes
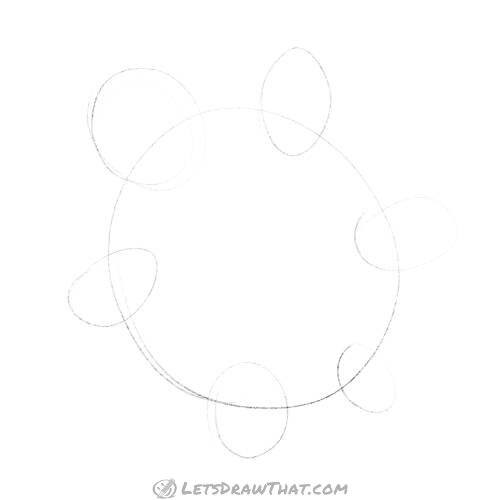
We begin our turtle by drawing some ovals that will be the base for the rest of the drawing. We start by drawing one large, almost circular oval. This will be the turtle's shell. We then draw a smaller oval at the top left of the shell, where we want the head to be, and another, even smaller oval opposite it, at the bottom right. That will be the turtle tail. After that, we add four similarly sized ovals, two on each side of the shell between our head and tail circles for legs. Make sure all the smaller ovals overlap into the biggest one, to make it look like the turtle has stuck its limbs from out of its shell.
Step 2 : Draw the shell rim

Now we will outline the rim of the turtle's shell. We do this by tracing the big oval that we drew in the previous step, and then drawing a smaller, parallel oval inside it.
Step 3 : Draw a turtle head and feet
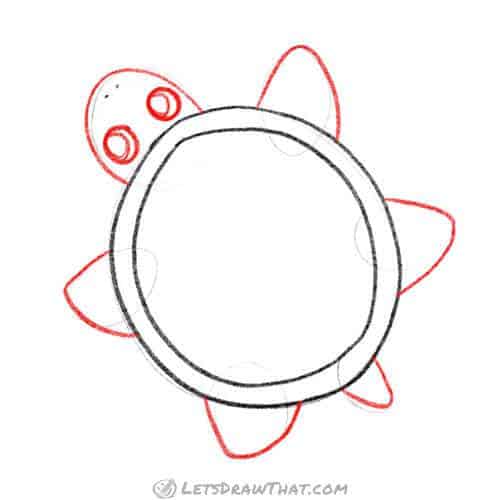
After drawing the shell rim, we add the feet, tail, and head. The feet and tail are very simple – trace over the ovals you drew before, but this time, make them more like rounded triangles. The head remains a nice oval when we trace it. Now that we have a head, we can add a face onto it! We draw the eyes as two circles, one inside the other. Next we add two small dots for nostrils.
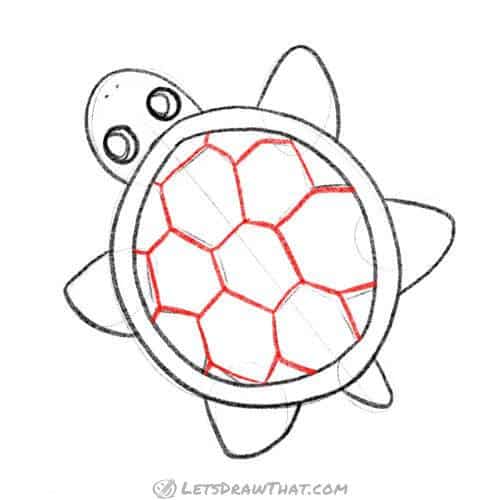
Step 4 : Sketch the central ridge for the shell pattern

Here comes the fun part! The shell pattern is the hardest bit in drawing a turtle, but it is what makes the turtle look like a turtle. The pattern will follow the centre of the shell. We start by drawing a light central line between the head and the tail for a guidance. Next we draw the the three short straight cross lines, which are at right angle (90 degrees) to the centre line. Finally, complete the hexagons by drawing the sides – two angled lines that connect the cross lines on each side. The hexagons do not need to be perfect, rather the opposite, you want them to be slightly irregular. You will notice we have drawn them slightly shorter at the top and longer at the bottom.
Step 5 : Add the rest of the shell pattern

Here we complete the shell pattern. Start by drawing more straight cross-lines, starting at the ridge points of the central hexagons. Then again complete the pattern by adding the two sides at angle. That will bring our hexagonal pattern close to the shell rim. Where needed, complete in by running yet another short cross line from the previous side ridge point to the edge of rim.
Step 6 : Outline the shell pattern
Now that our shell pattern is complete, trace the hexagons you have drawn. Again notice we have slightly rounded all the sharp corners.
How to draw a turtle in a simple top view: finished drawing
How to draw a turtle in a simple top view: finished outline drawing
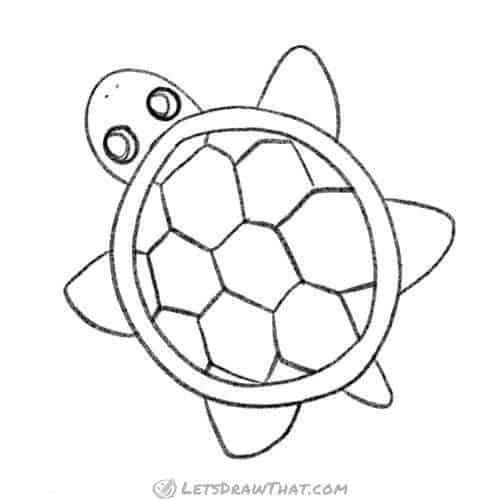
Using an eraser, erase all the guidelines and clean up the sketch. Here is the complete outline of our turtle drawing.
How to draw a turtle in a simple top view: finished drawing coloured-in

Colouring is optional, as always, but helps your drawing to stand out. Here, we have used a single orange colour for the shell. We have left the top of the shell lighter colour, to give the impression that sunlight is reflecting off the shiny shell. We have shaded the edges of the shell darker just by adding more pressure on the pencil and few extra colouring layers. That makes the shell pop up to suggest it is a half dome, rather than just flat. On the other hand, shading on the head, legs and tail has been done by first colouring it with light green and the adding shadows with a darker green. We do not have any shiny highlights – the body inside isn't shiny like the shell – but still suggest volume.
Like this tutorial? Share it with others:

How to draw a turtle from an angle

Don't be put off by the complicated lines and angle of our second turtle drawing! When broken down, it's still made up of the same simple shapes. We even get to use the same trick for the shell that we used on the last turtle, although this time you can't see the whole pattern because of the three-quarter angle that we used. This turtle is a sea turtle, which means that instead of walking, its flippers are meant for swimming.
How to draw a turtle from an angle: base sketch step by step
Step 1 : Sketch where the head and shell will be
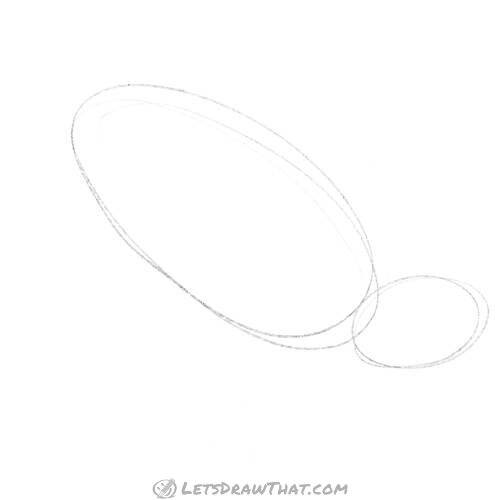
We start drawing our turtle by sketching two ovals – one large and long one for the shell, and a smaller one touching it for the head.
Step 2 : Add the fins
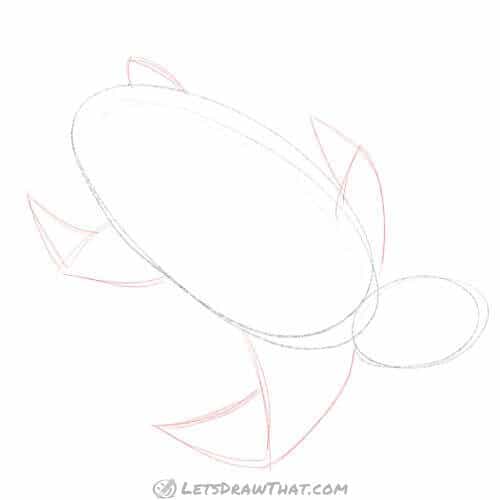
Next, we draw turtle fins. We build them from two triangles – larger one attached to the turtle body and a smaller one attached at an angle to complete the fin. You will notice that the fins are different sizes – this is because a turtle's back flippers are smaller than its front ones. But why is the left front flipper smaller than the other one? It's simple – perspective. The flipper is further away from the viewer, and so it appears smaller. Also, you will notice that we have only used one triangle for the left-back flipper. It is because it is partially hidden by the shell.
Step 3 : Sketch the face and shell ridge

Here we start sketching the details for our turtle. First, we sketch a face – at this stage, that means cutting a curved line through our head oval and adding two more ovals – one partly hidden behind the curved line – for eyes. We add a small line at the bottom of our head as well to mark where the mouth will be. After that, we start drawing the turtle shell pattern. Add two almost parallel lines curving across the larger shell oval for guidance. Next, split the shell ridge into sections by drawing four short cross lines. Notice these are curved a little, to suggest the round shell shape.
Step 4 : Add on to the shell pattern

With the central guidelines in place, we can build the hexagonal shell pattern. Add two more lines at an angle on each side of each section to build an irregular hexagons – six-sided shapes.
How to draw a turtle from an angle: outline the drawing
Step 1: Draw in the shell

Now we are ready to start outlining the shell. First, we outline the shell with a kind of football shape oval. This will be the outside of our shell. Next, we add add another line around the bottom of the football shape, which will create the rim of the shell. As you are outlining the shell, try to keep the ridge pattern that we have drawn about three-quarters of the way up the shell. That will maintain the side angle view, that makes our turtle drawing interesting
Step 2: Draw the fins

With the shell outline in place, trace the fin shapes we drew before. Round any sharp angles as you draw, to make the flippers nice and smooth.
Step 3: Draw in the face
Now it is time to complete the turtle's face using the guidelines we drew before. Draw the eyes almond-shaped – round on one end, and pointy at the other. Draw the front eye so it bulges out above the head a bit. Finally, do not forget to draw the pupils – oval in the front eye, and just a curved line in the partially hidden rear eye! Now we draw the nose. Connect the curved line near the eyes with the line at the mouth in a sort of rounded square shape. Sea turtle's mouths are very beak-like, so make sure you have a beak-like curve where the snout becomes the mouth. Finally, finish the head outline connecting the mouth-line to the shell with a curved line.
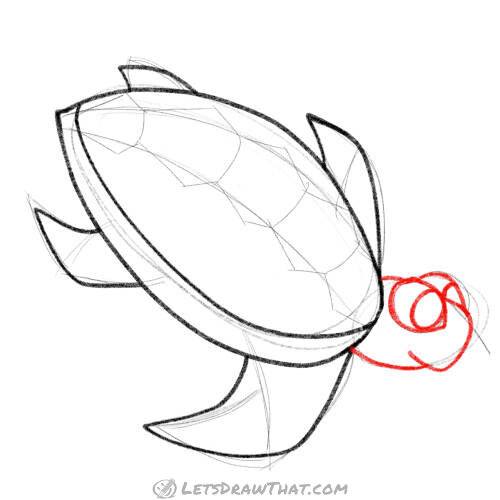
Step 4: Draw a turtle shell pattern

Now it is time to draw the shell pattern properly and completely. Start by tracing the hexagons on the ridge you drew before. Then connect the ridge points of the hexagons with the edges of the shell. The turtle shell rim has a pattern onto it as well, although much simpler. Here we draw a kind of half circles. By overlapping the circles one onto another – not starting the second right at the bottom, but rather a halfway up the previous, we build similar pattern that looks lake a half hexagons.
Step 5: Add patterns on the skin

We are almost done drawing our sea turtle. Let's just add few details onto the turtles' body! Sea turtles have a kind of cracked skin pattern. There is not one clear shape you should use – we have used some squishy triangles and squares, but you can try other shapes too! What about a turtle covered in circles?
How to draw a turtle from an angle: finished drawing
How to draw a turtle from an angle: finished outline drawing

Using a soft eraser, erase all the guidelines you don't need any more, and clean up the sketch. This is the complete drawing – now you can draw a sea turtle too!
How to draw a turtle from an angle: finished drawing coloured-in
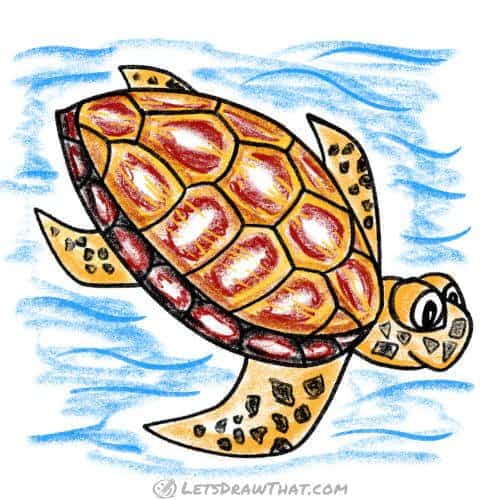
Let's complete the drawing by colouring the turtle. Here we have chosen yellow as the main colour to use for the turtle skin, combined with a brown-red for the shell, as seen on some of the beautiful underwater photographs. We have used the same yellow to outline the shell pattern, combined with a red-brown to fill in the hexagons. The fill in each hexagon is a kind of circle with a white centre – that suggest the highlight on the segments of the shell and make the whole drawing more plastic and interesting. We have coloured the spots on the turtle's skin black and added some more black and brown on the rim of the shell. That darkens the rim – suggests a shadow and gives the colourful shell a grounding outline. And that is the very end of our how to draw a turtle tutorial.
Like this tutorial? Share it with others:

How To Draw A Turtle Swimming
Source: https://letsdrawthat.com/how-to-draw-a-turtle/
Posted by: charettebegather1962.blogspot.com
0 Response to "How To Draw A Turtle Swimming"
Post a Comment