

How To Draw Mandalas In Photoshop
Make magnificent Mandala paintings in Photoshop CC
Watch video: Make abstract mandala paintings in Photoshop CC
Photoshop CC's Brush tool is full of hidden delights, and in this project we'll explore one of our favorites to create an eye-catching effect. Simple yet ingenious, the Symmetry Painting feature enables you to paint in several places at once.
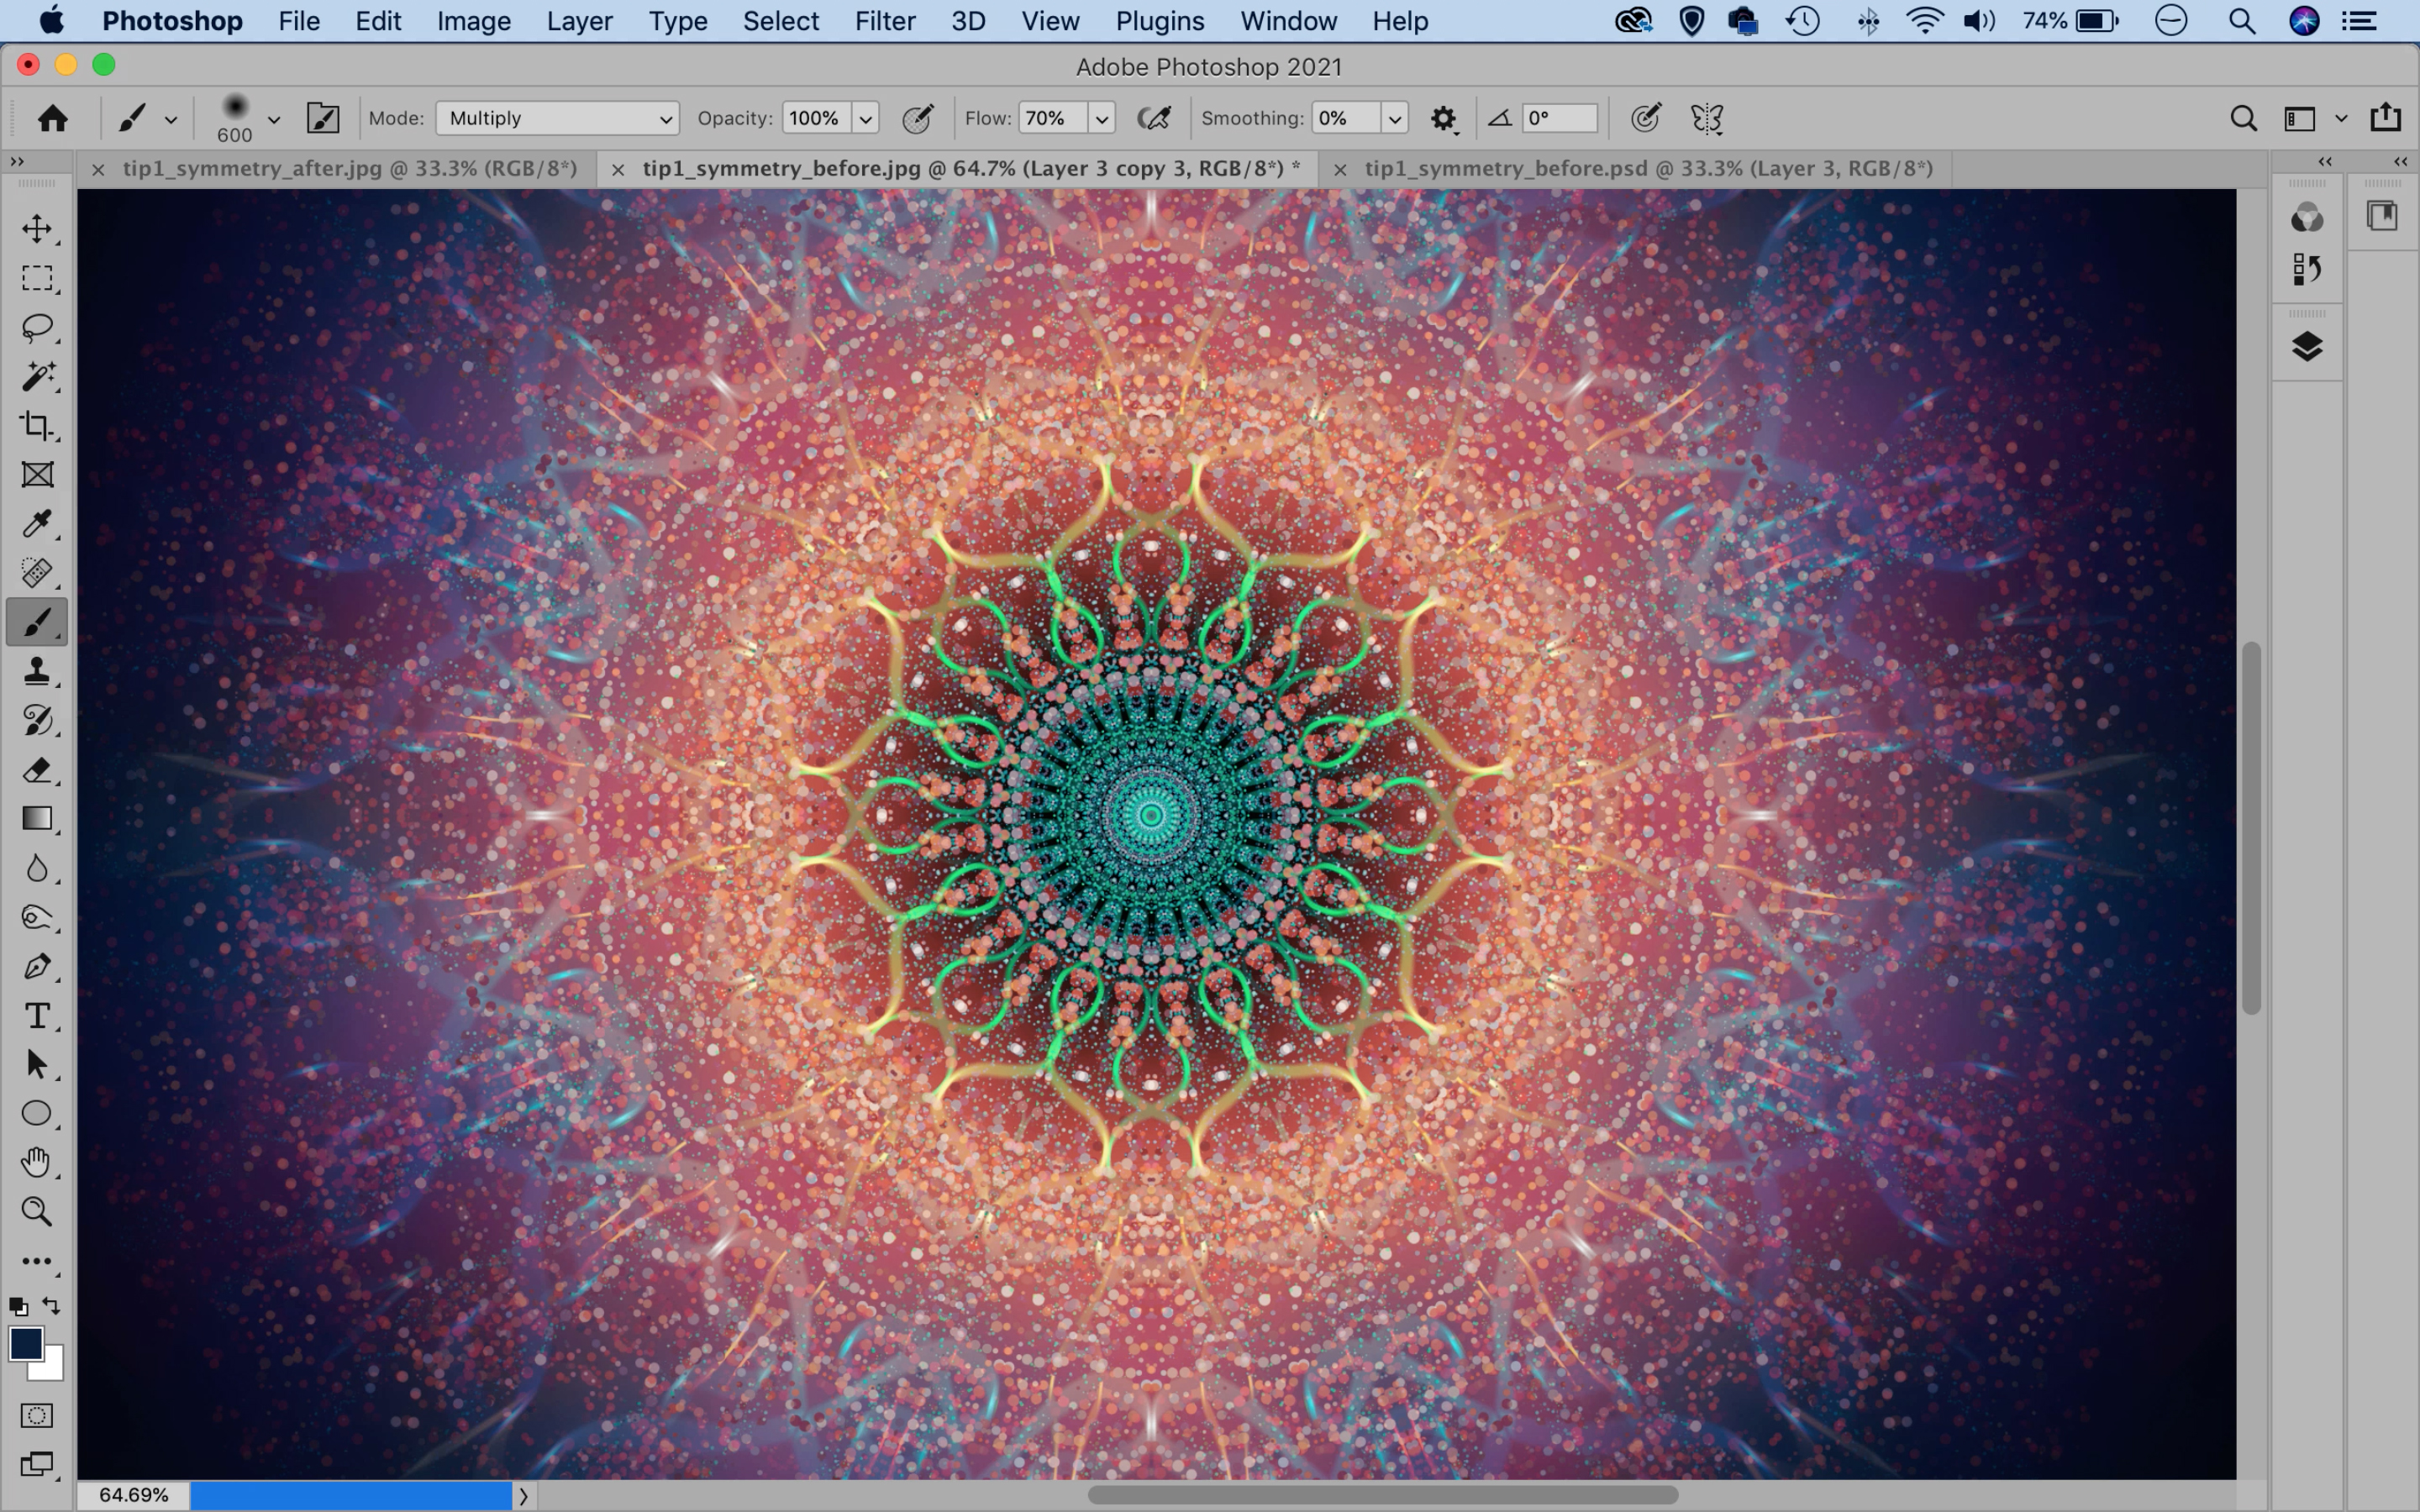
There are several types of Symmetrical Painting options to experiment with, but the most enjoyable is Mandala. Often found in Hindu and Buddhist symbolism, Mandalas are geometric patterns organized around a single central point (in fact, 'Mandala' is Sanskrit for 'circle').
The Mandala brush setting in Photoshop enables you to create these sorts of designs in seconds. You can also choose how many segments for your design, which essentially determines how many places you can paint at once. It's simple to set up, creative, and easy to lose yourself painting circular Mandala patterns.
Of course, we don't need to stop at painting – we can also call upon other tools in Photoshop to take our painting further. We can experiment with blend modes or apply filters (we added a touch of zoom blur here). There's also the myriad other options in the Brush tool, like scattering and smoothing that we can use in combination with the symmetry setting.
Once done, we can also go on to combine our paintings with images. This is easier than it looks; all we need to do is drop in a suitable photo, like the eye image here, then use a few simple blending tricks to combine it with the painting underneath.
01 Create the base
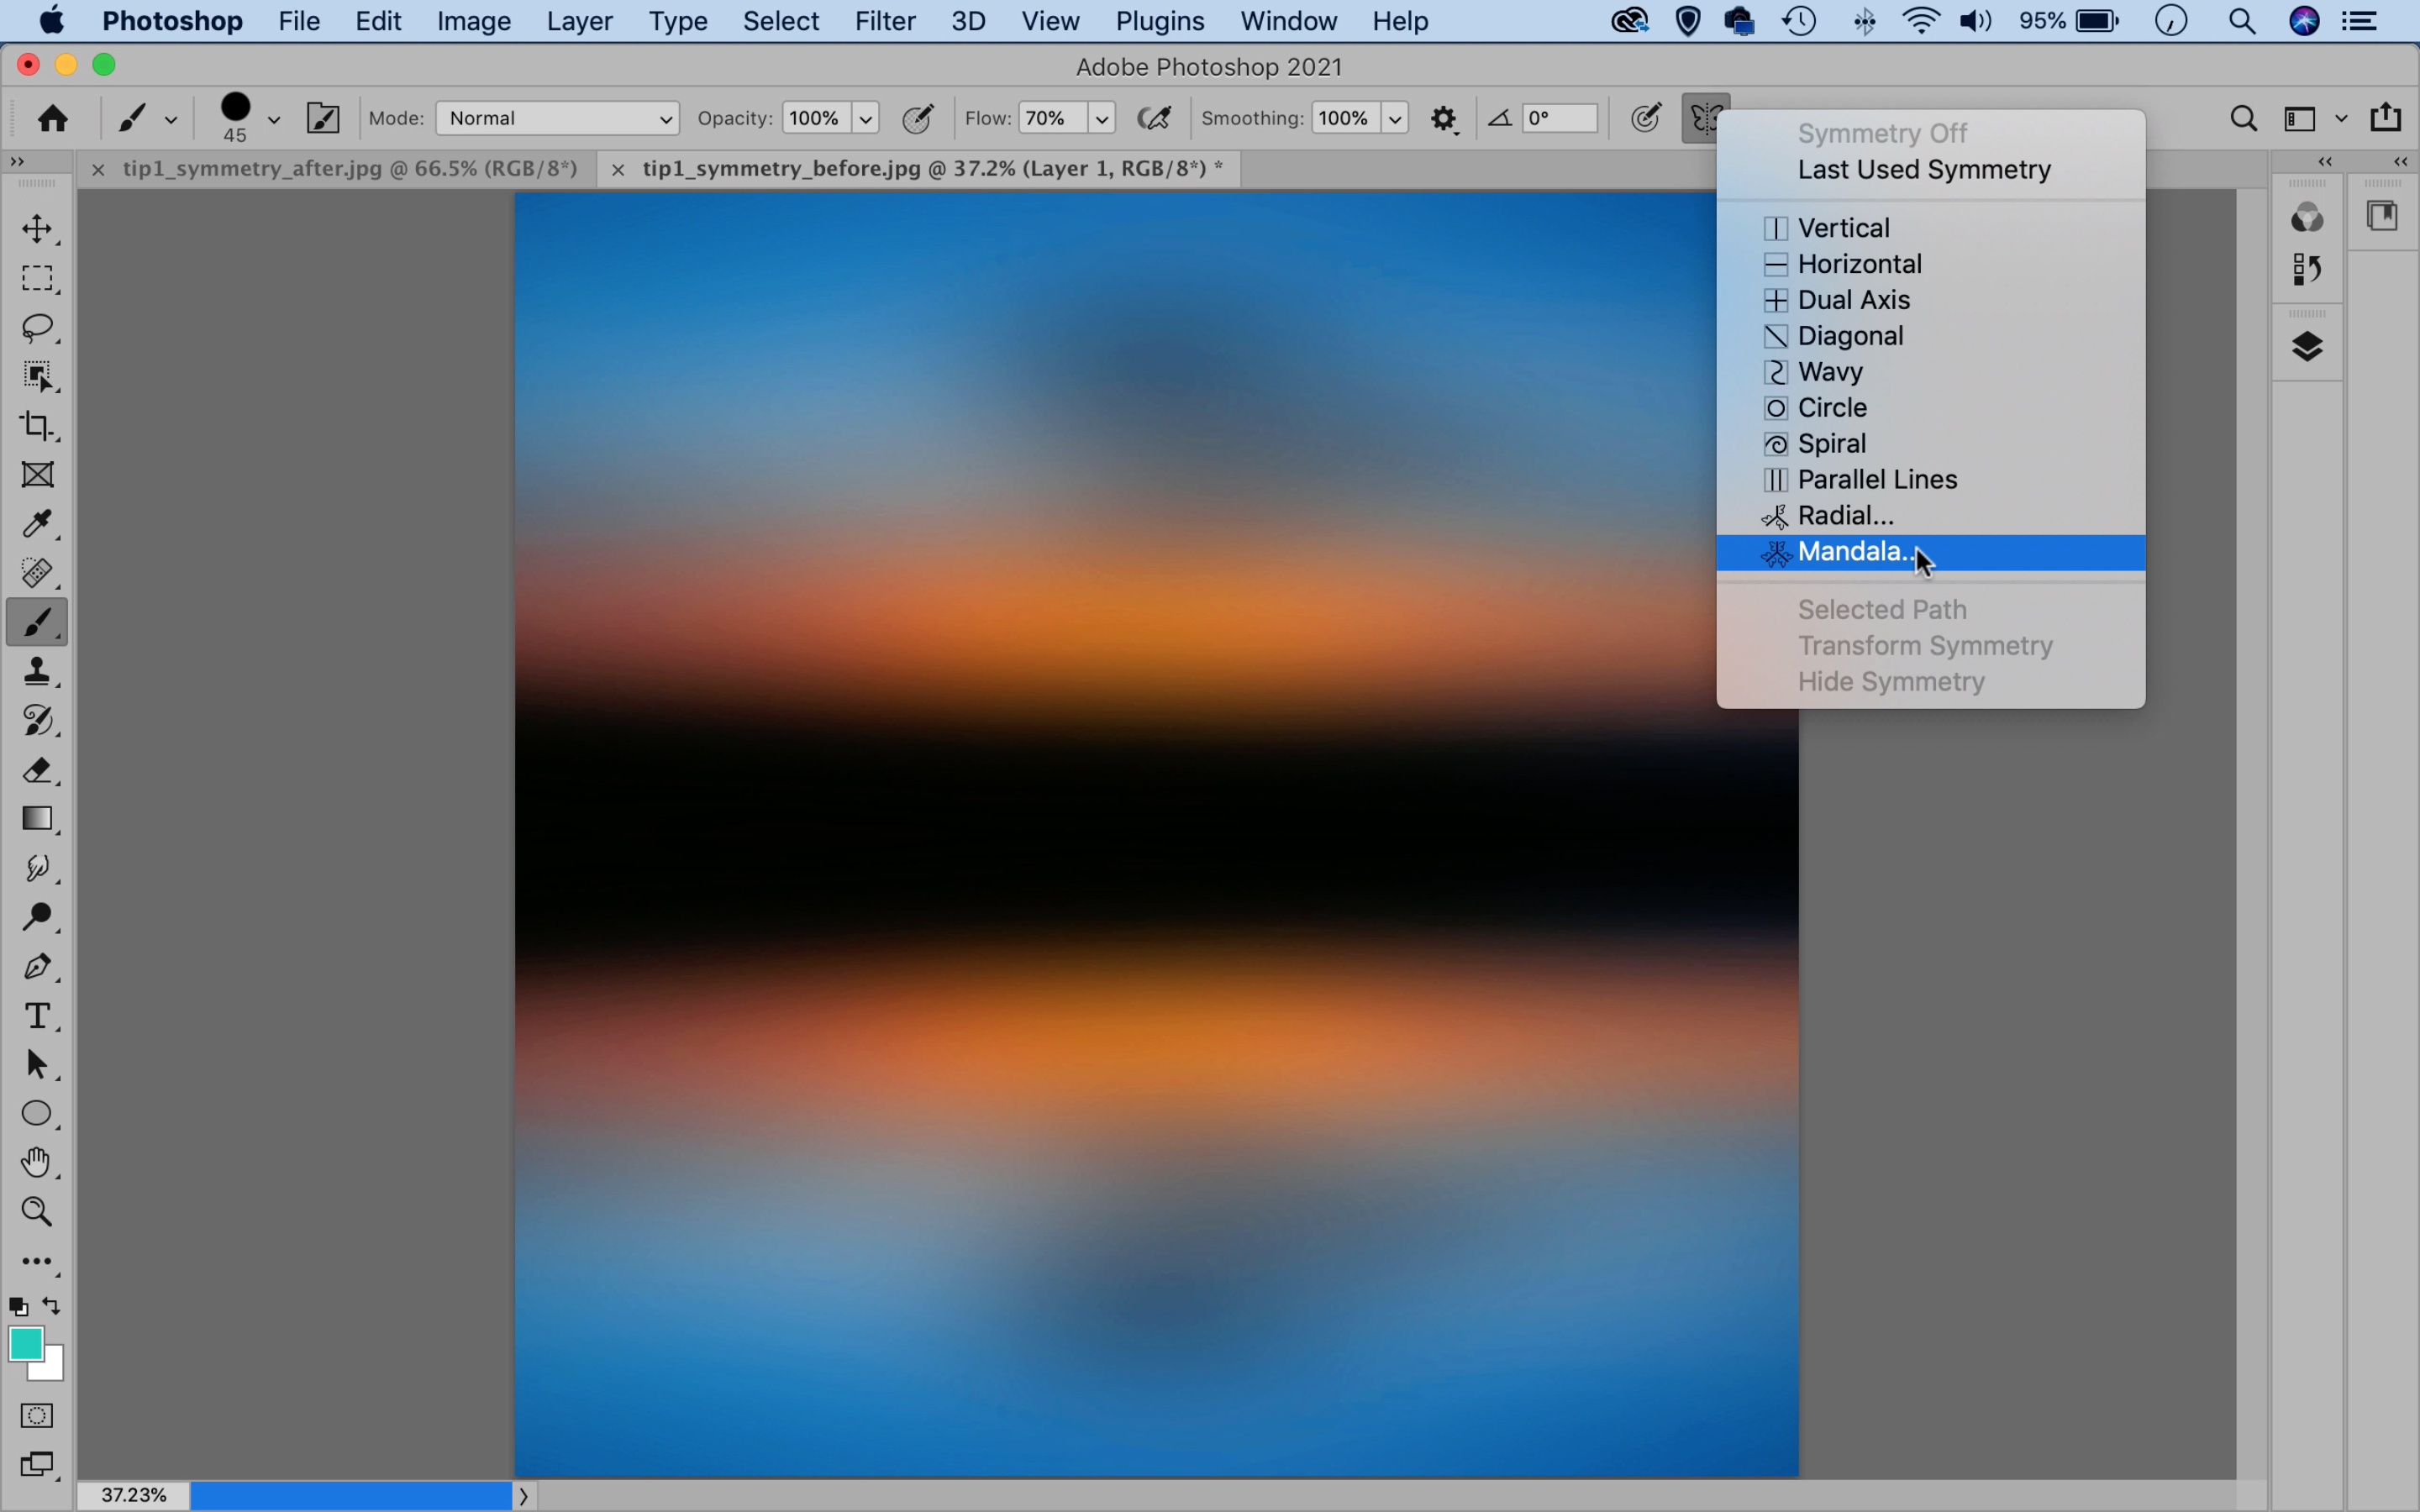
Make a new document (File > New) or use a photo as a base for your painting (you can download our start images here). Make a new empty layer for your painting, then grab the Brush tool and choose a color. Click on the butterfly icon in the tool options at the top to enable symmetry painting.
02 Paint with symmetry
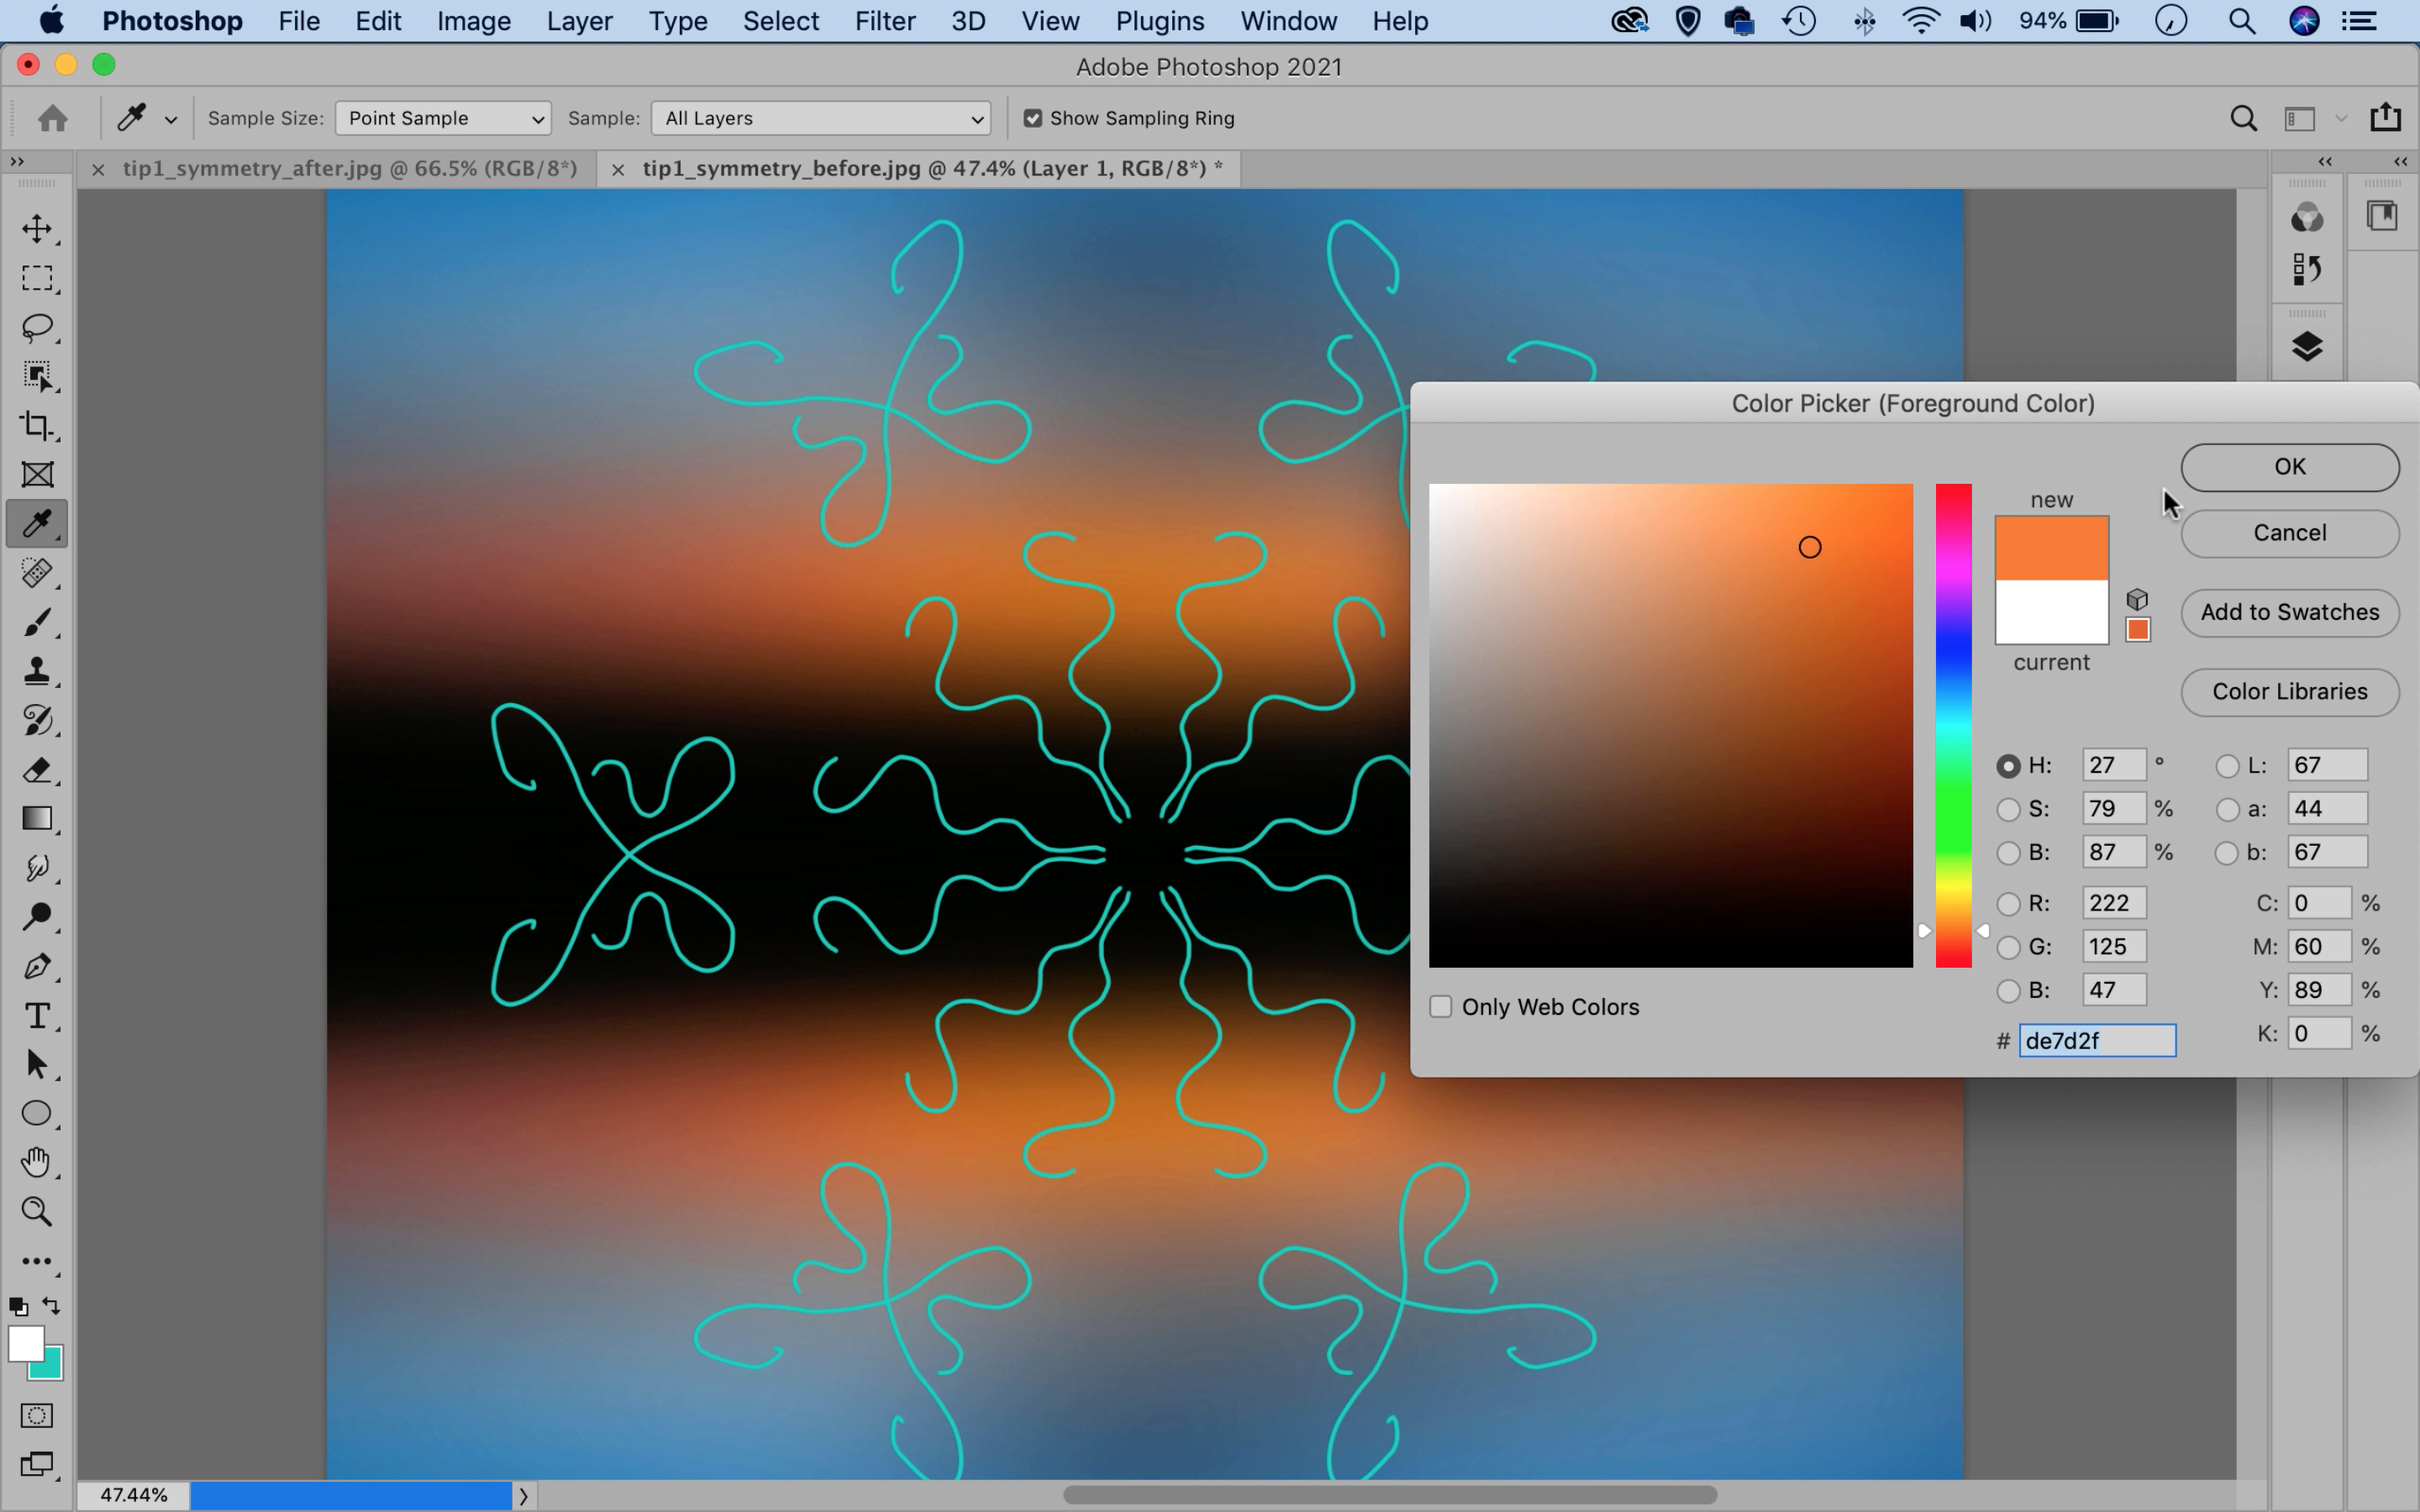
Choose Mandala, then set a number of segments for your painting. Start painting with the brush tool and you'll see paint appear in several places at once. If you're using a mouse try increasing Smoothing to 100% in the options for smoother lines. Experiment with different colors and brushes.
03 Experiment with brush settings
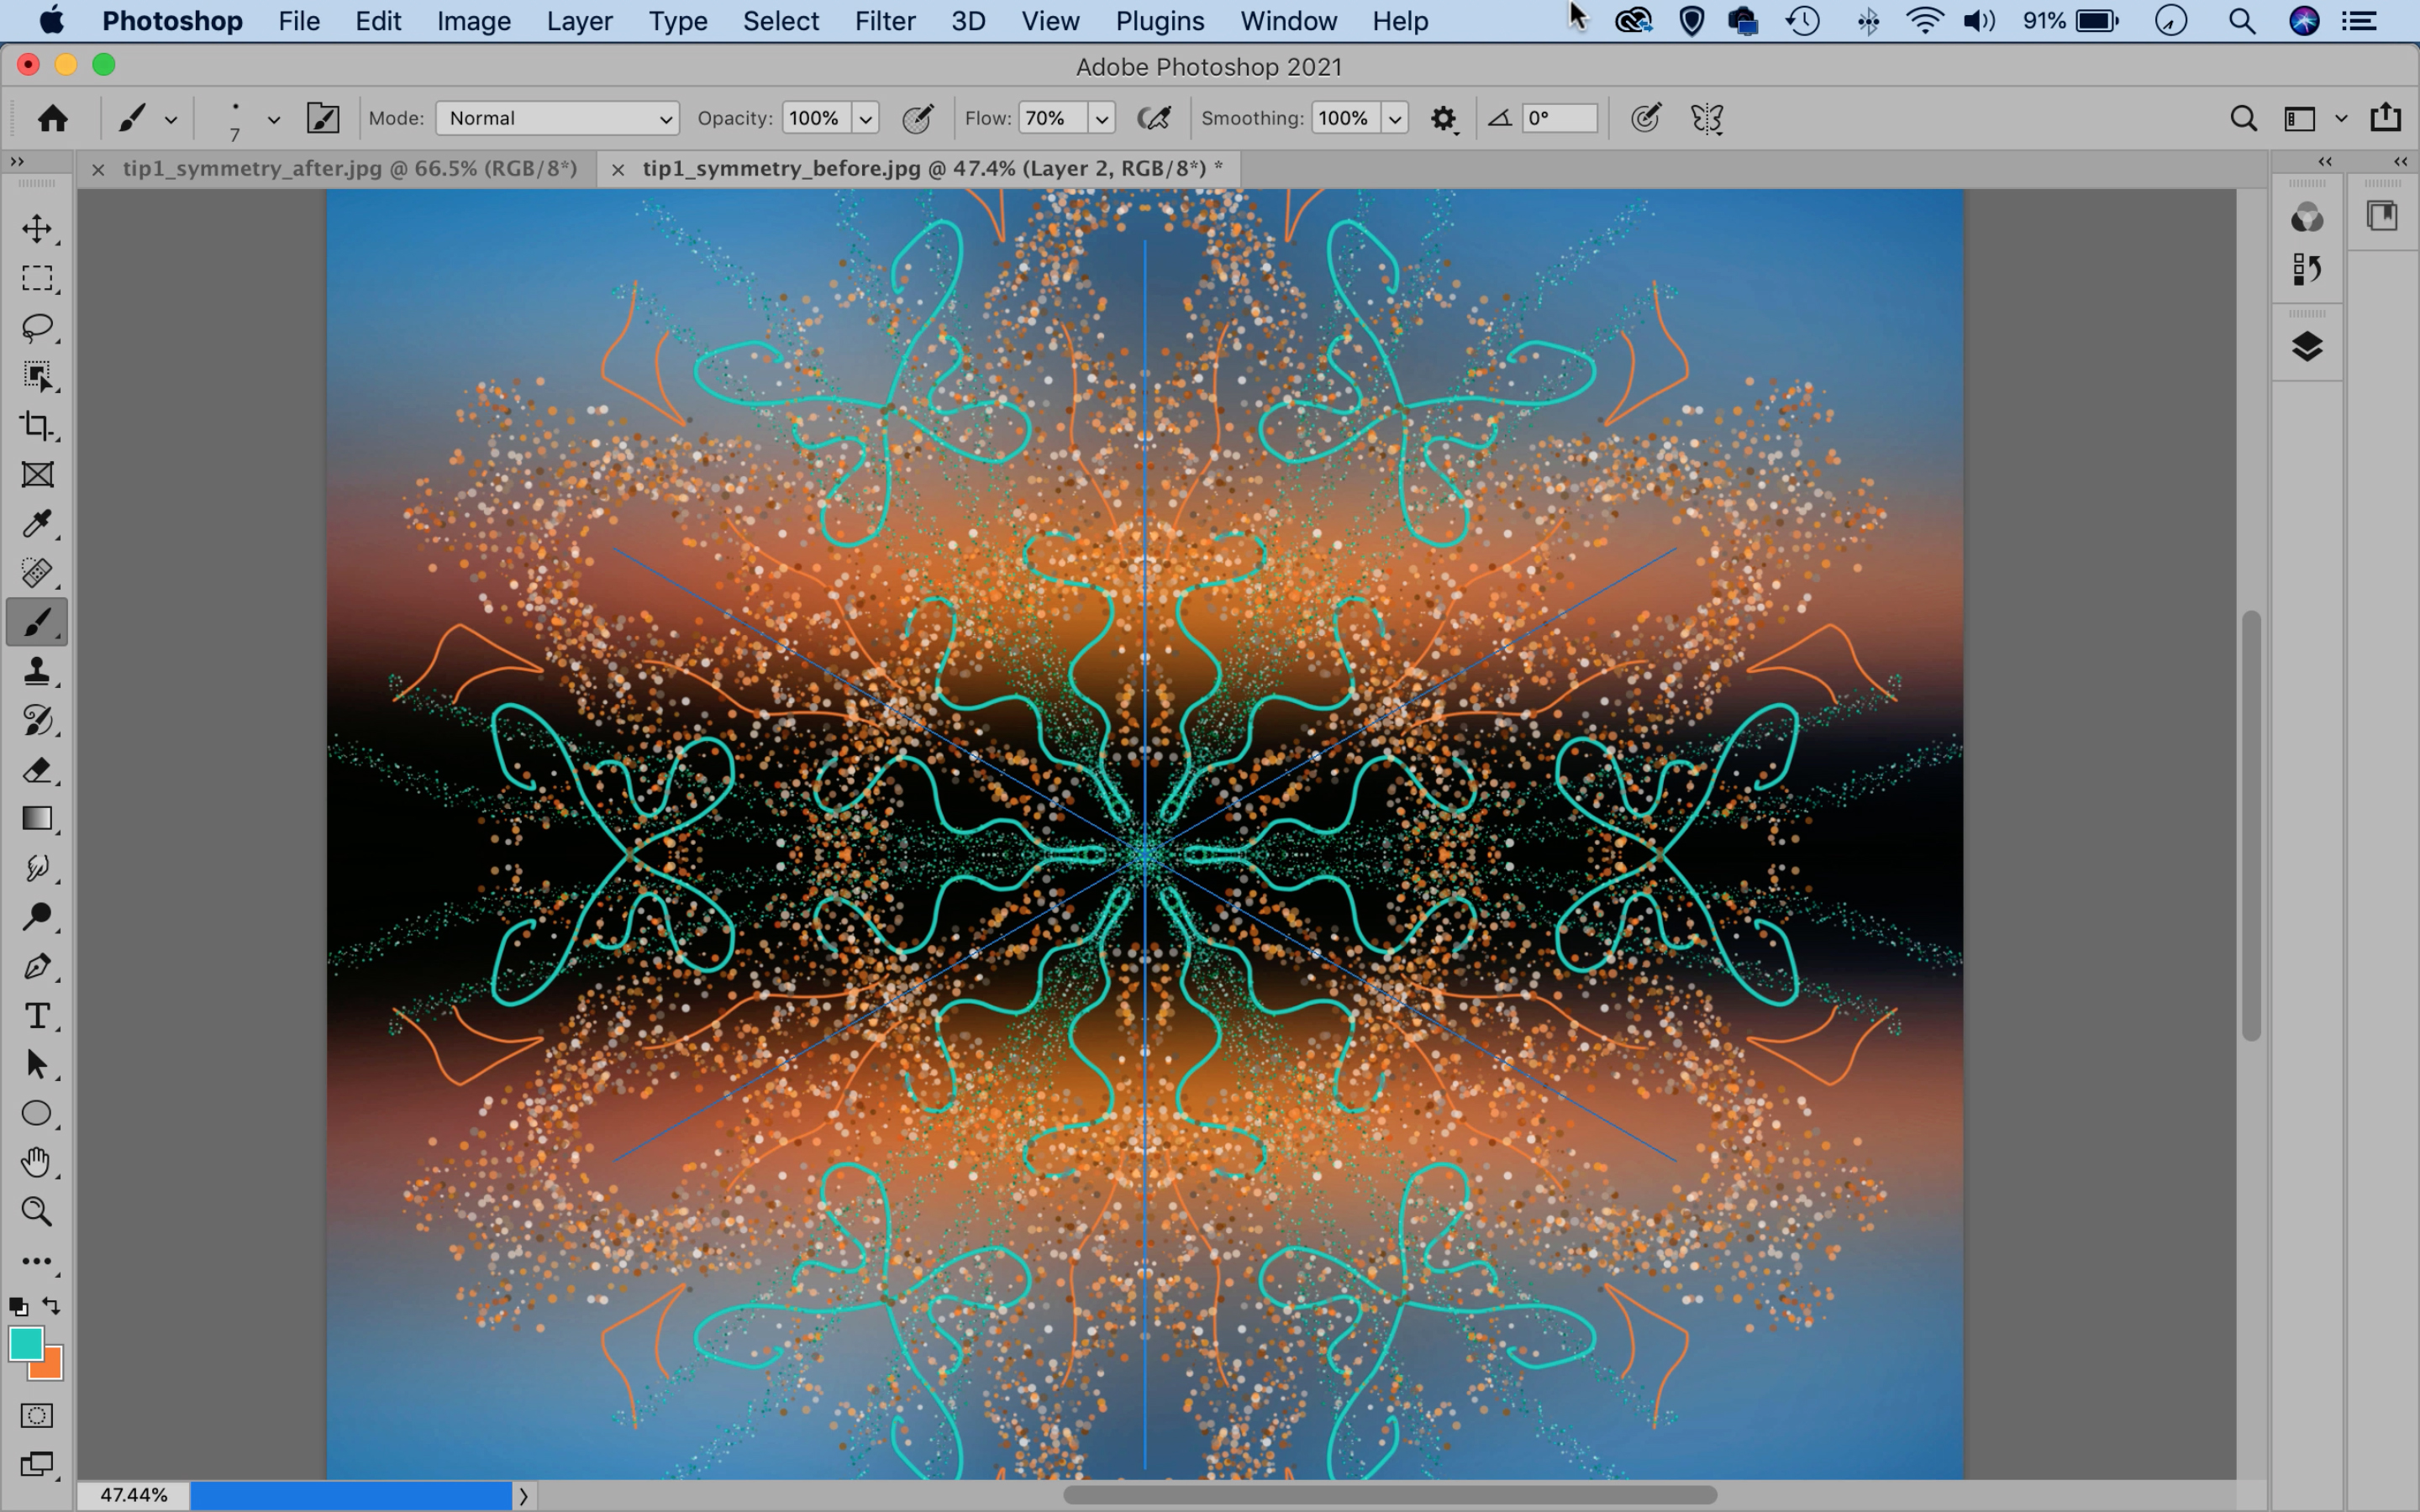
Click on the brush panel icon at the top and experiment with brush settings. Check Scattering and increase scatter. Go to Brush Dynamics and increase Size Jitter. Check Brush Tip Shape and increase Spacing. Click Color Dynamics and increase Hue Jitter. Paint to create scattered dots.
04 Blend and filter
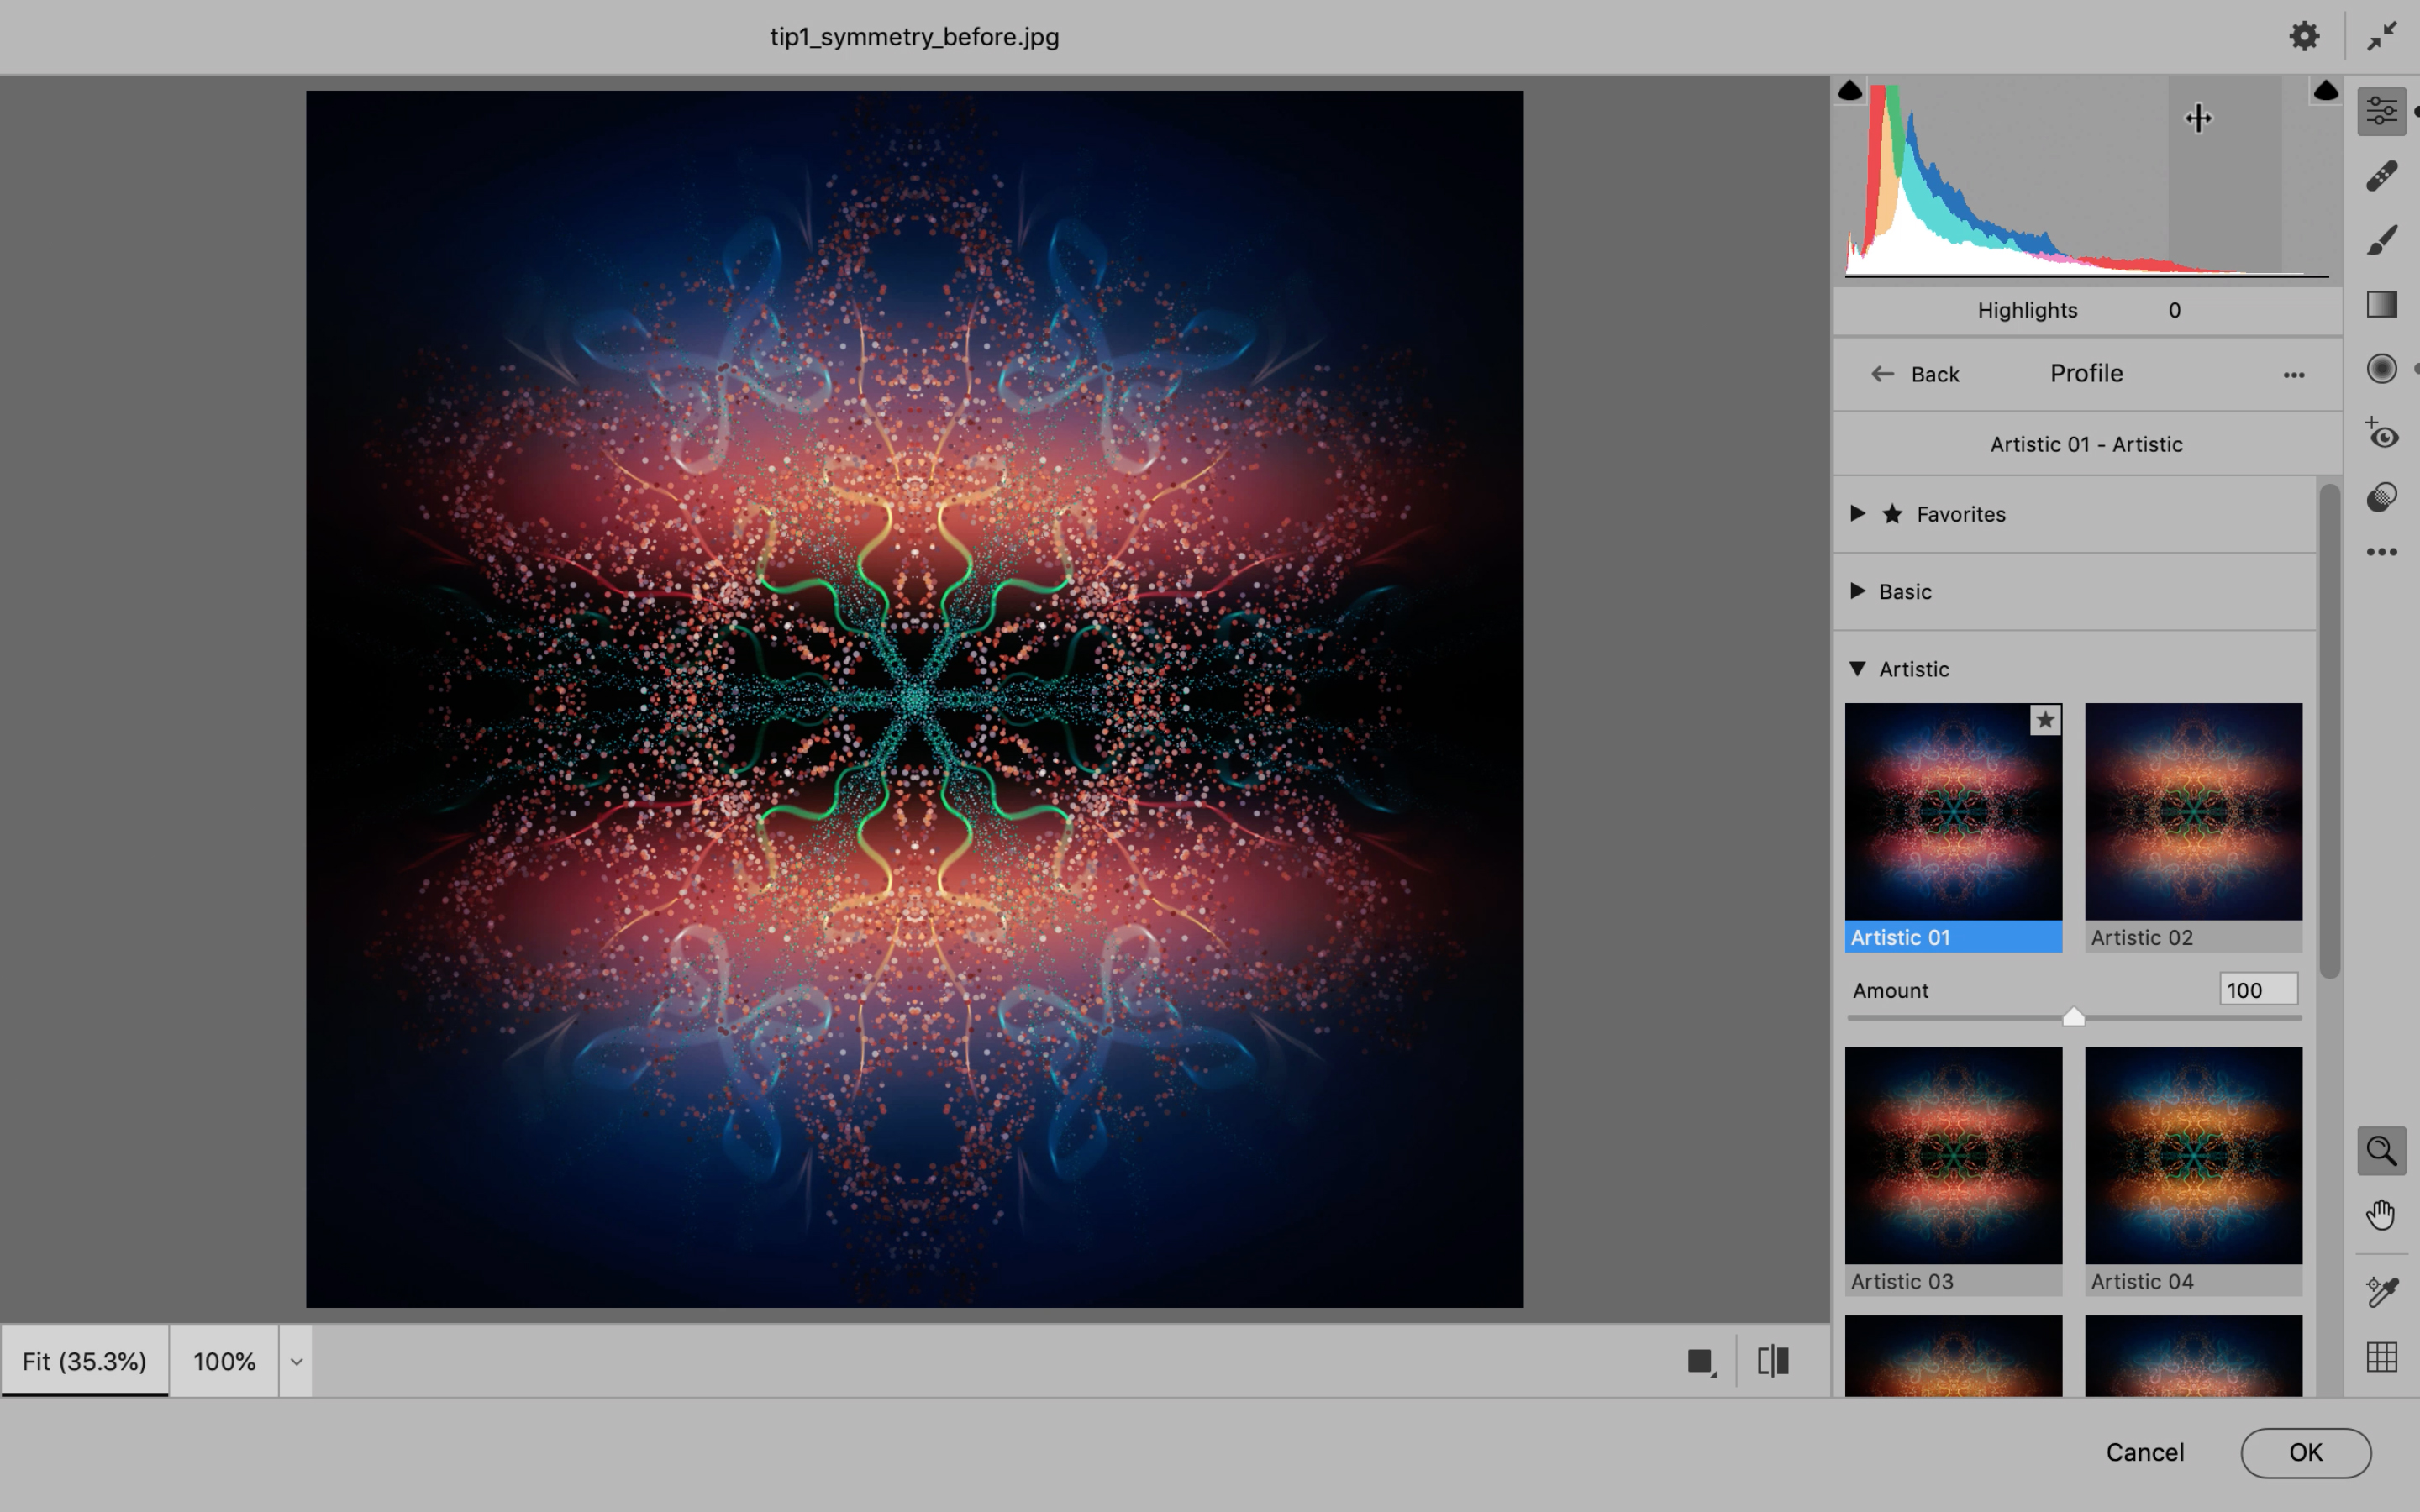
Set the layer Blend Mode to Color Dodge, then apply the Radial Blur filter (Filter > Blur > Radial Blur). Next, merge a copy of all the layers with Cmd/Ctrl + Shift + Alt + E, then go to Filter > Camera Raw Filter. Grab the Radial Filter tool, double-click on the image and reduce Exposure to make a vignette.
05 Transform and repeat
Choose a Profile in the Camera Raw settings to alter the colors (we used Artistic 01 here). Hit OK, then duplicate the layer with Cmd/Ctrl + J and set the Blend Mode to Lighten. Hit Cmd/Ctrl + T to transform, hold Shift and rotate the layer by 45 degrees. Press Cmd/Ctrl + Shift + Alt + T two times to repeat the transform.
06 Blend an image
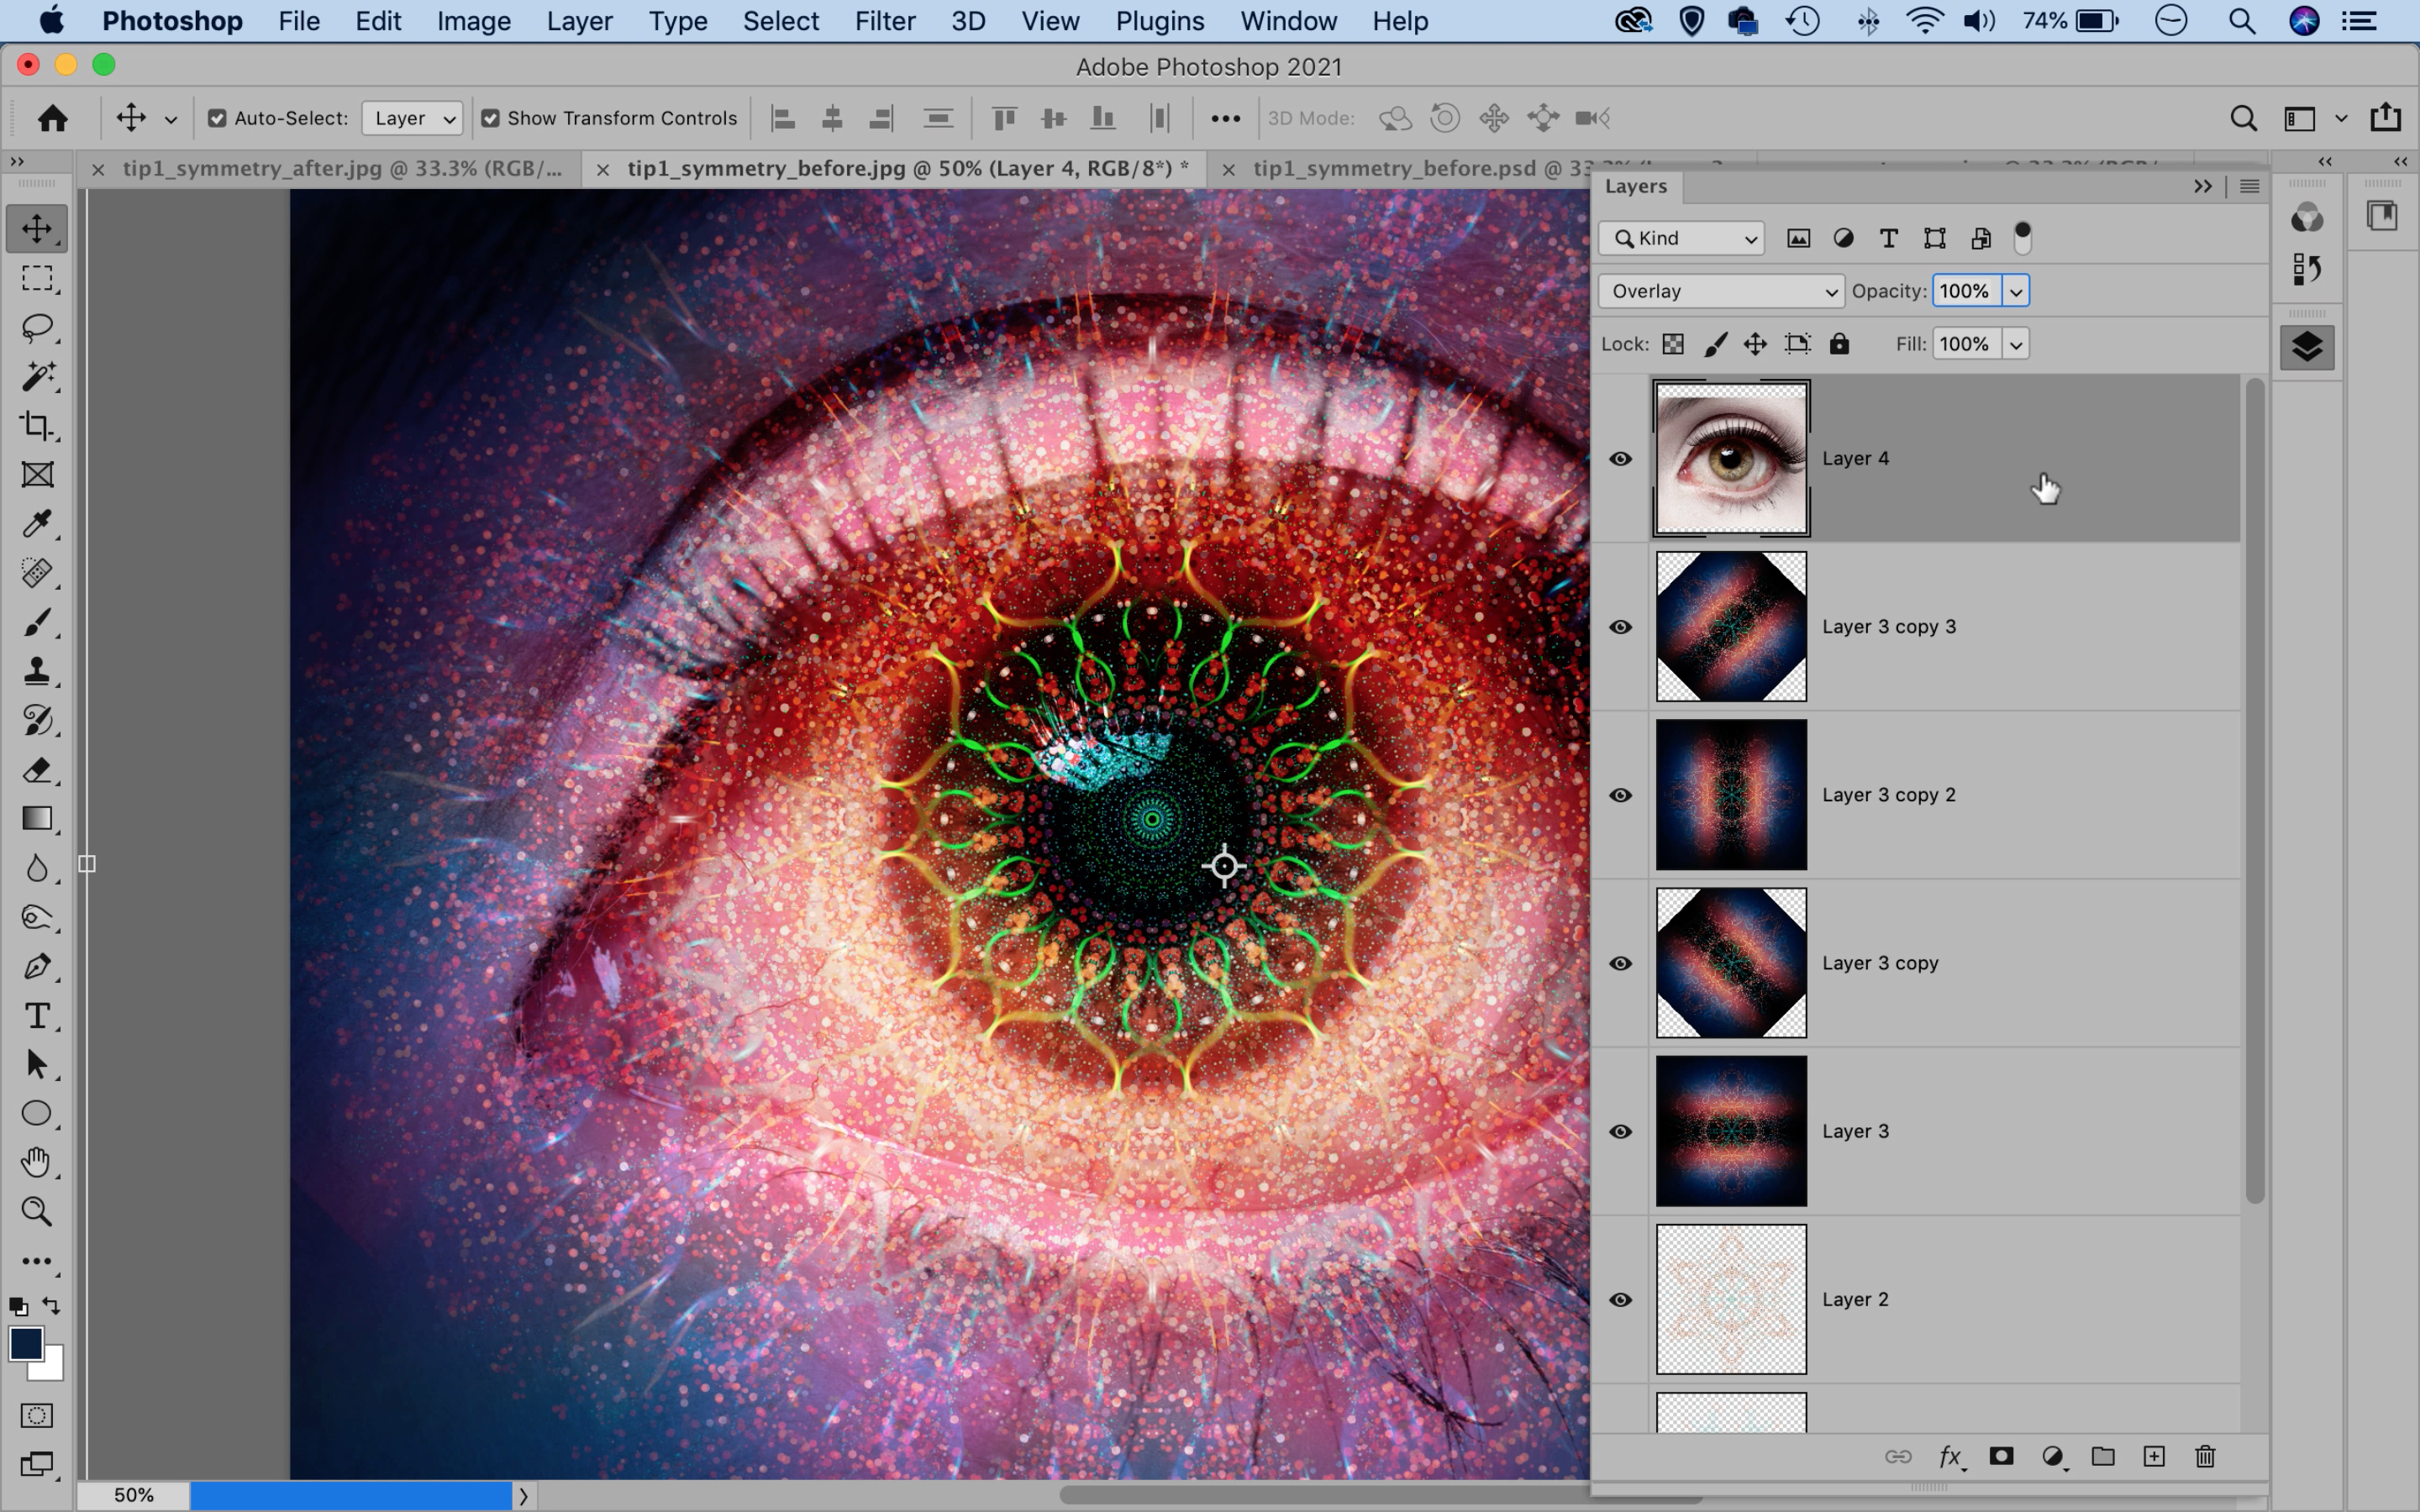
Drag and drop the eye image in, hit Cmd/Ctrl + T to transform and resize it to fit, then change the Blend Mode to Overlay. Duplicate the layer with Cmd/Ctrl + J then double-click it. Drag the 'This Layer' white point halfway in, then hold Alt and drag the left half of the slider all the way across.
Read more:
The best photo editing software: image editors for novices through to pros
The best photo-editing laptops: top laptops for photographers
10 best online photography courses – from beginner guides to masterclasses
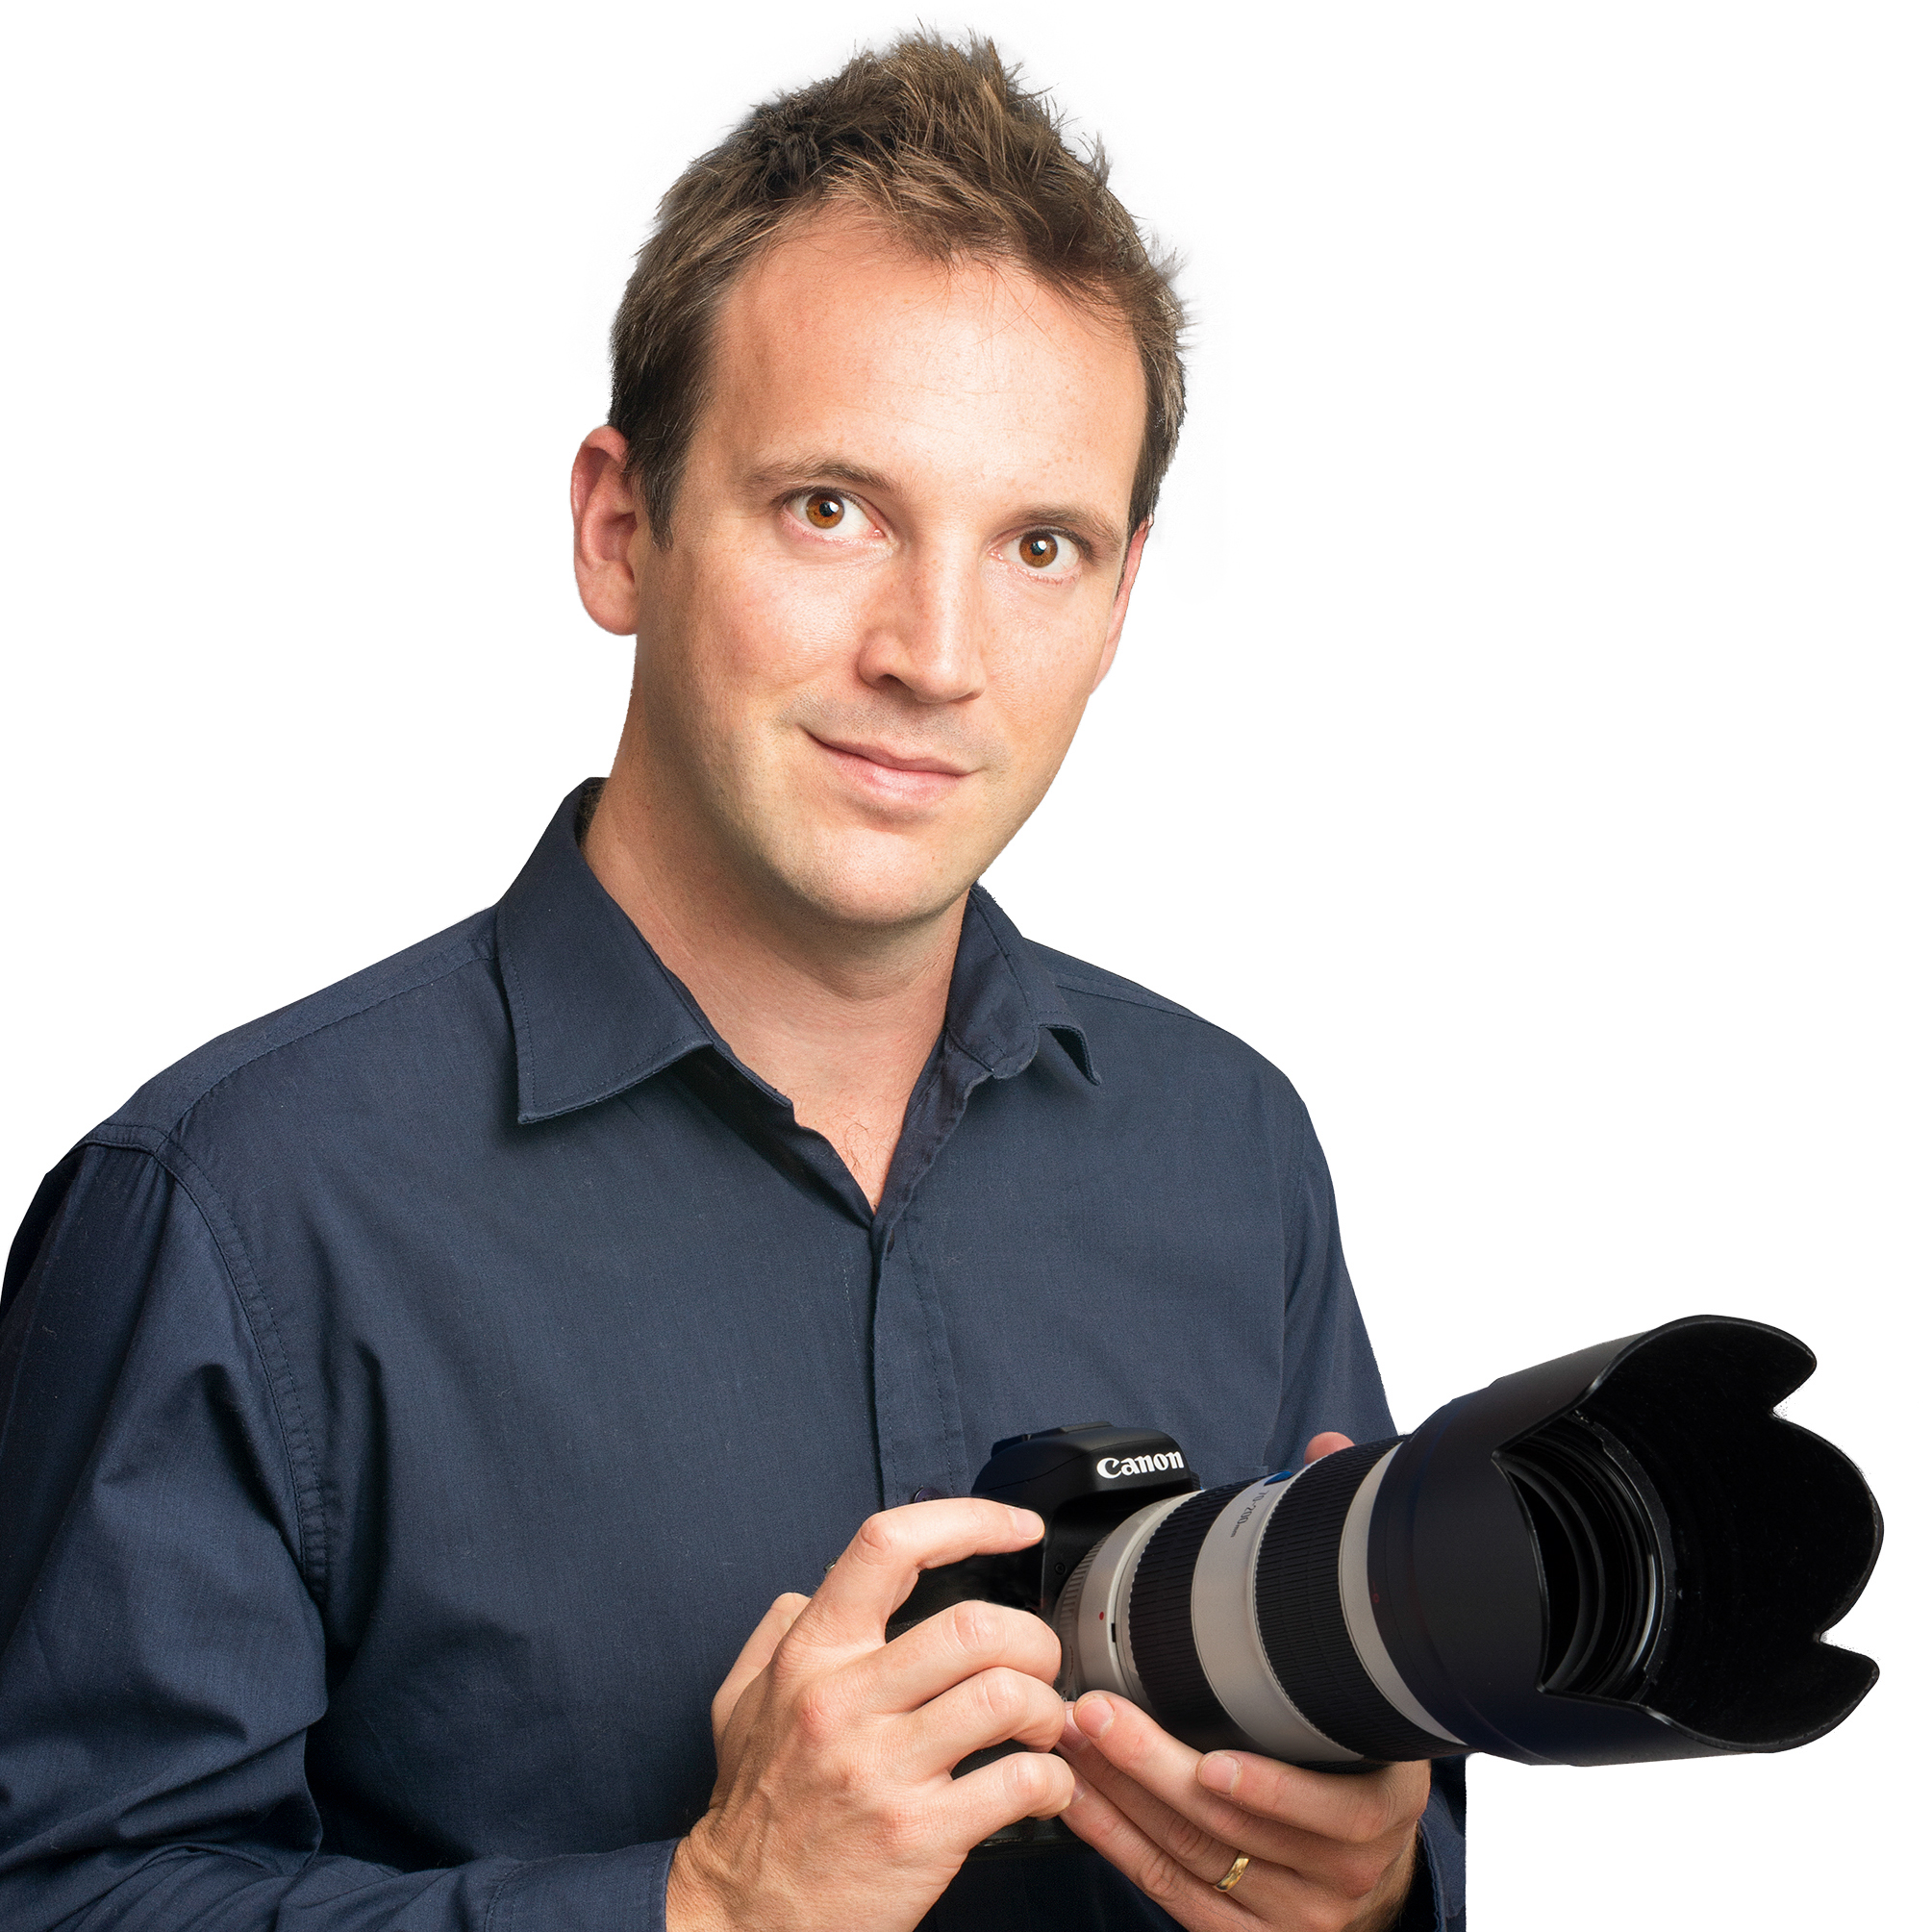
The lead technique writer on Digital Camera Magazine, PhotoPlus: The Canon Magazine and N-Photo: The Nikon Magazine, James is a fantastic general practice photographer with an enviable array of skills across every genre of photography. Whether it's flash photography techniques like stroboscopic portraits, astrophotography projects like photographing the Northern Lights, or turning sound into art by making paint dance on a set of speakers, James' tutorials and projects are as creative as they are enjoyable. He's also a wizard at the dark arts of Photoshop, Lightroom and Affinity, and is capable of some genuine black magic in the digital darkroom, making him one of the leading authorities on photo editing software and techniques.
Related articles
How To Draw Mandalas In Photoshop
Source: https://www.digitalcameraworld.com/tutorials/make-magnificent-mandala-paintings-in-photoshop-cc
Posted by: charettebegather1962.blogspot.com
0 Response to "How To Draw Mandalas In Photoshop"
Post a Comment